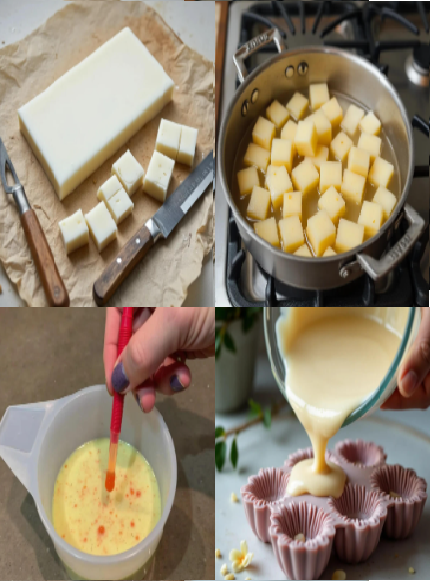
Here are the steps to melt a soap base and pour it into silicone molds:
Step 1: Prepare the Workspace
Ensure your workspace is clean, dry, and free from any distractions.
Lay down a heat-resistant surface, such as a silicone mat or a ceramic tile, to protect your work surface from heat damage.
Step 2: Cut the Soap Base
Cut the soap base into small cubes to ensure even melting.
The size of the cubes will depend on the size of your silicone molds.
Step 3: Weigh the Soap Base
Weigh the soap base cubes using a digital scale to ensure you have the correct amount.
Make a note of the weight, as this will be important for adding colorants, fragrances, or other additives later.
Step 4: Melt the Soap Base
Place the soap base cubes in a heat-resistant mixing bowl or a double boiler.
If using a microwave, heat the soap base in 30-second increments, stirring between each interval, until the soap base is fully melted.
If using a double boiler, heat the soap base over low heat, stirring occasionally, until the soap base is fully melted.
Step 5: Add Colorants and Fragrances (Optional)
If desired, add colorants, fragrances, or other additives to the melted soap base.
Stir well to ensure the additives are fully incorporated.
Step 6: Prepare the Silicone Molds
Ensure the silicone molds are clean and dry.
If necessary, lightly spray the molds with a release agent, such as cooking spray, to ensure the soap will release easily.
Step 7: Pour the Soap Base into the Molds
Pour the melted soap base into the prepared silicone molds.
Make sure to fill the molds to the top, as this will help prevent air bubbles from forming.
Step 8: Allow the Soap to Cool and Harden
Let the soap cool and harden in the molds.
This can take anywhere from 30 minutes to several hours, depending on the size of the soap and the temperature of the workspace.
Step 9: Remove the Soap from the Molds
Once the soap is hard, remove it from the silicone molds.
If necessary, gently flex the molds to release the soap.

